Clients: Sharing Clients With Other Practitioners
Sessions Health provides tools to share a client’s record with additional practitioners when collaboration is needed. Practices can grant access to a single client or create separate client profiles when different treatment modalities or privacy needs require distinct records.
In this article:
- Sharing Access to a Single Client
- Setting Up Multiple Client Profiles for Privacy or Different Disciplines
- Frequently Asked Questions
- Related Resources
Sharing Access to a Single Client
This section explains how to grant or revoke access to a client’s record so practitioners can collaborate when needed.
💡 By default, only the assigned practitioner and administrators can access a client’s record. Practices can expand access by enabling full clinical access for a practitioner or by granting access to individual clients as needed.
To grant access to a single client:
-
Go to the client's chart.
-
Select the three‑dot menu.
-
Choose Manage Access.
-
Select additional practitioners as needed.
-
Select Save.
To revoke access, use the same Manage Access menu and deselect the additional practitioner(s).
ℹ️ Check out our Tutorial Video: Managing Clients in a Group Practice.
Setting Up Multiple Client Profiles for Privacy or Different Disciplines
ℹ️ Only administrators can complete all of the steps below.
There may be times when practitioners need to “share” a client across different treatment modalities, or when you want to create separate profiles for the same client to maintain privacy between disciplines. This workflow creates distinct client profiles while still allowing the client to manage both through their portal.
💡 Use this workflow only when two practitioners must maintain separate documentation for the same client (for example, different treatment modalities or privacy requirements).
Step 1: Create the first client profile
Create the client if they are not already in the system: Clients > +Add > Individual > Create.
Assign the first practitioner. If the client already exists, skip this step.
Step 2: Create the second client profile
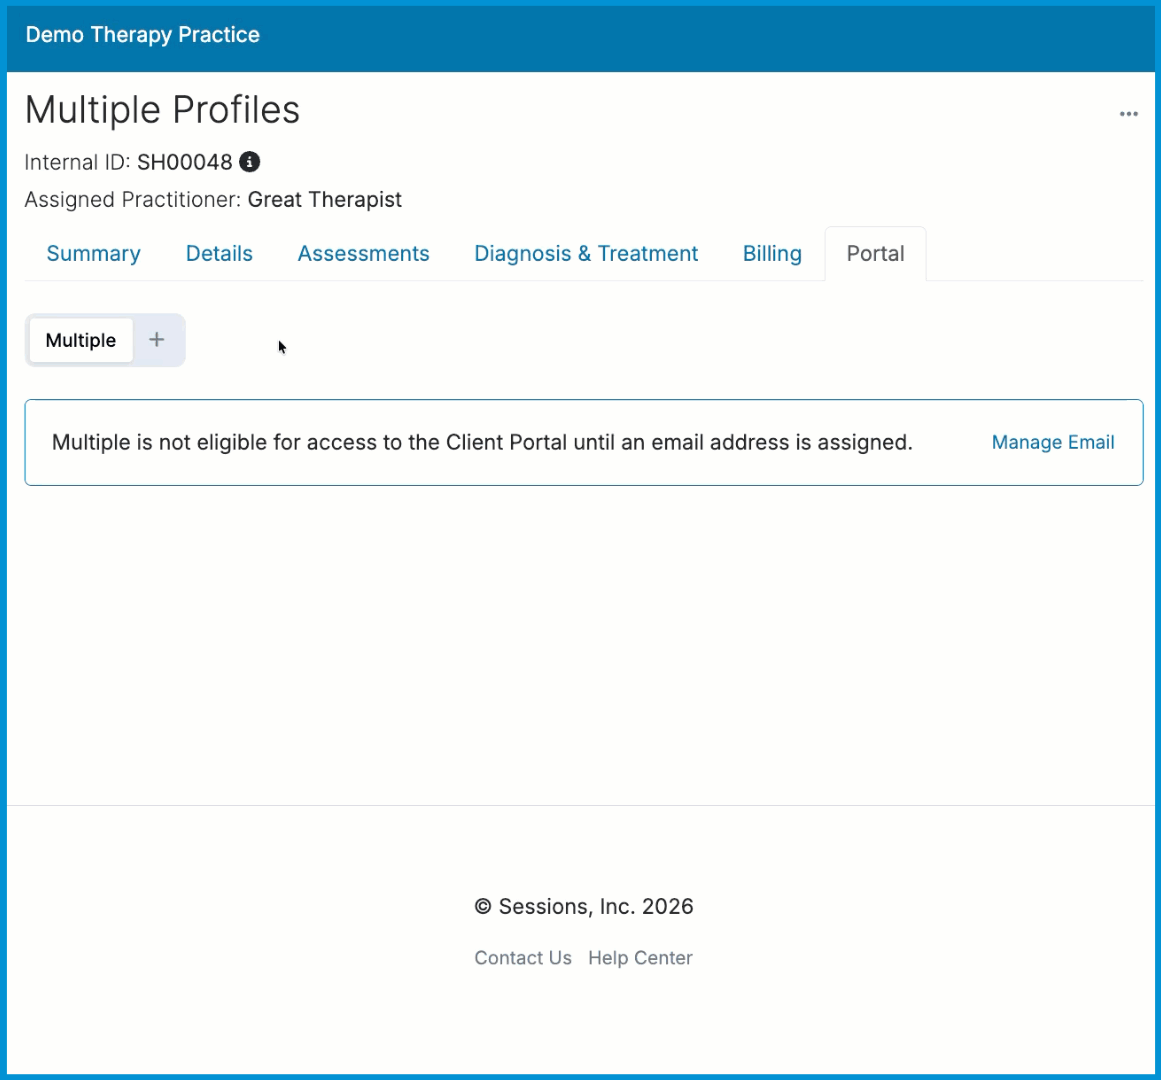
Create another profile using the same name and leave the email address blank (different client charts cannot share an email address).
Step 3: Link the profiles through the Portal tab
Open the second profile’s Portal tab. Select the + to add a contact, choose Existing contact, and search for the first client. Set the relationship to Self and save.
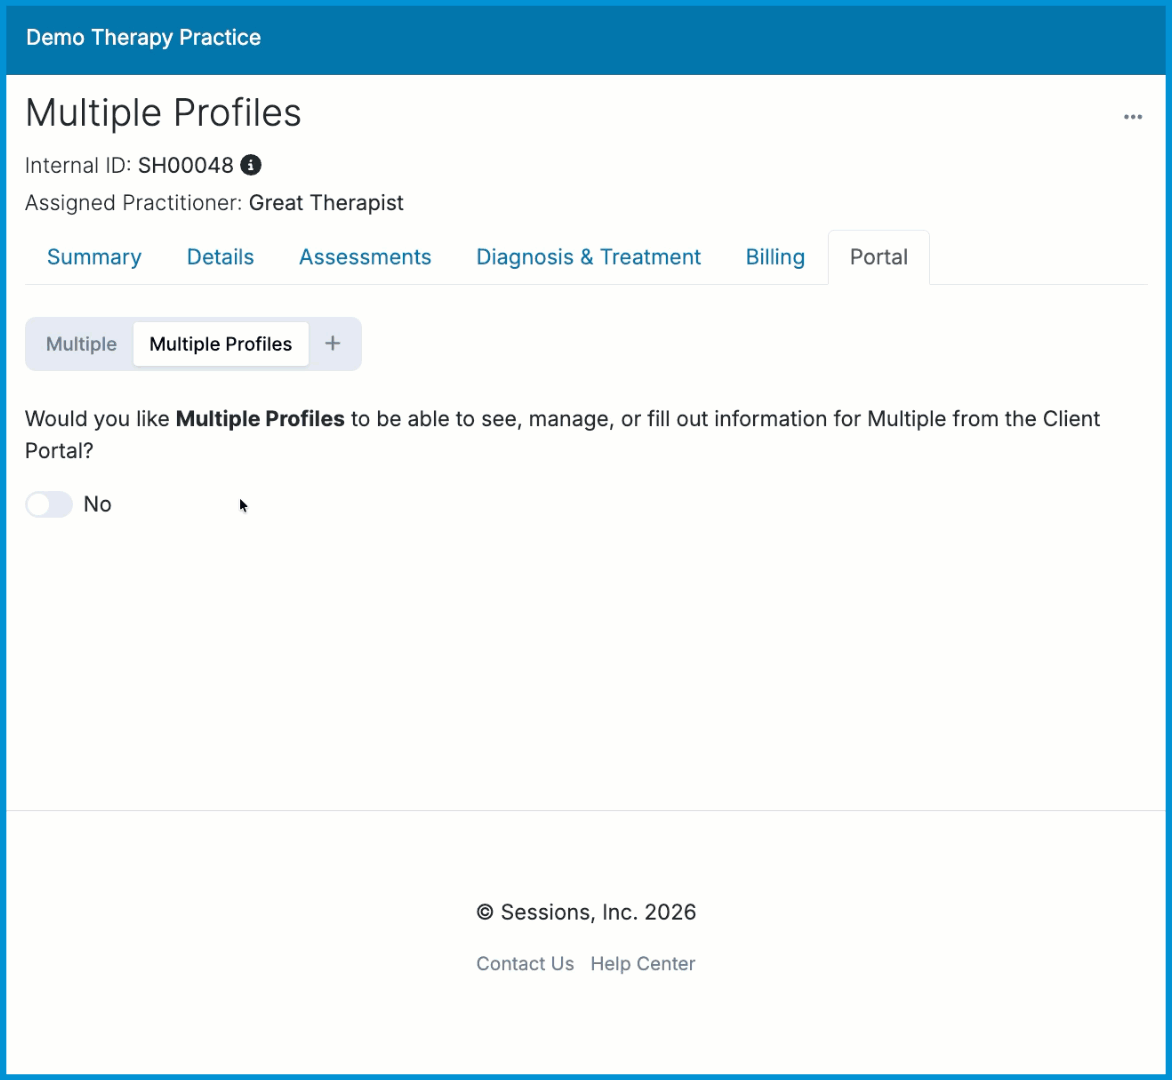
Step 4: Invite the client to the second profile’s portal
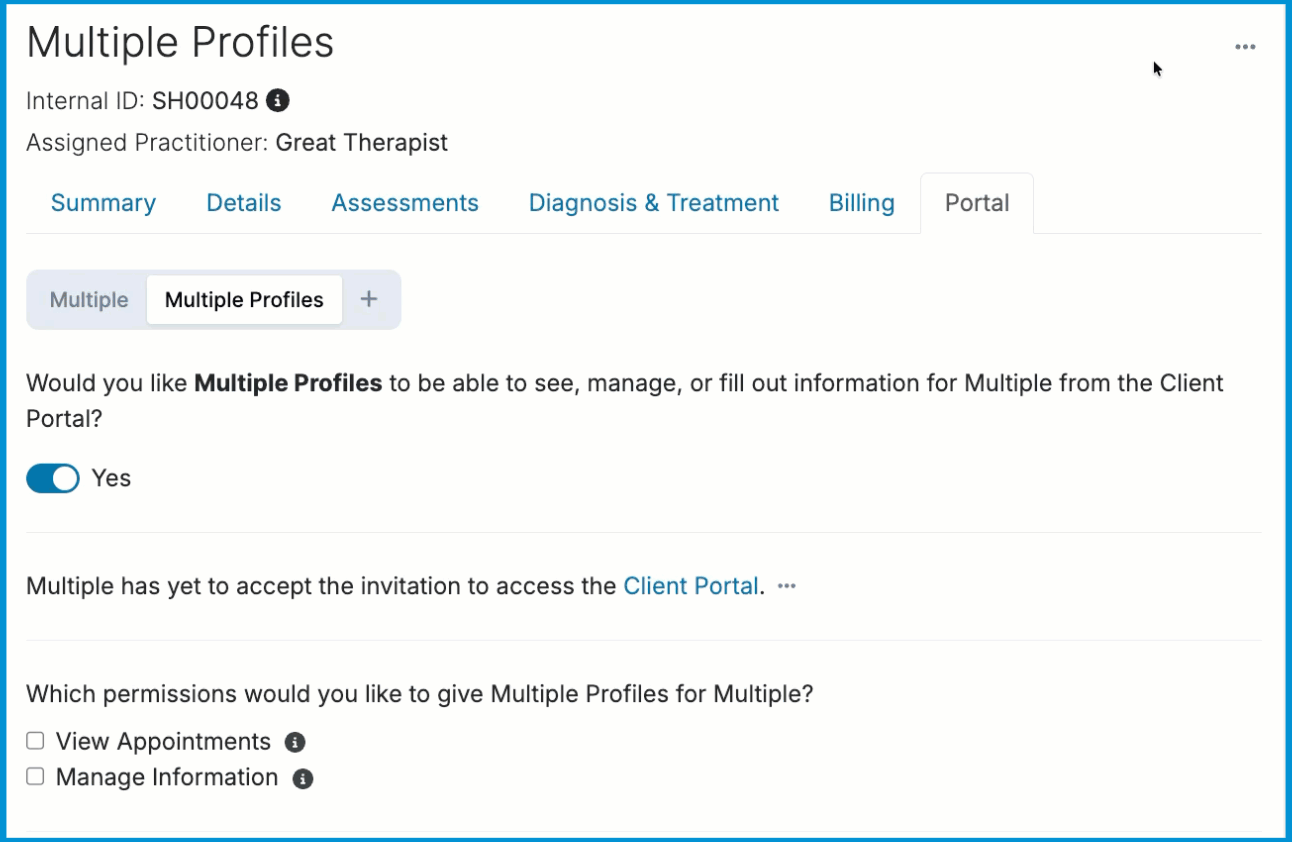
From the second profile’s Portal tab, select Invite to Portal. Toggle Yes to allow the client to manage information for this profile. The client will now have an additional login in their portal account.
Under Which permissions would you like to give {Name} for {Name}?, optionally enable View Appointments and Manage Information. Enable these if the client needs to view or manage information for both profiles in their portal.
Step 5: Assign the second profile to the second practitioner
Update the Assigned Practitioner field as needed by selecting the three-dot menu > Reassign Practitioner and choosing the applicable practitioner name.
Step 6: The second practitioner can now manage the chart and send documents
Each practitioner will now work from their own profile with separate documentation, billing, and portal workflows.
From the second profile’s Portal tab, the second practitioner can send intake documents and manage portal workflows independently. See Sharing Forms & Documents Through the Client Portal for more information.
💡 After following the steps above, your client will have access to multiple profiles upon logging into the Client Portal.
Frequently Asked Questions
Does sharing a client give a practitioner access to all clients?
No. Sharing access only applies to the specific client you select. Full clinical access must be enabled separately.
Will the client see anything different when multiple profiles are created?
Yes. The client will see an additional login option in their portal and can switch between profiles.
Can I undo a shared‑access change?
Yes. Open the client’s chart, select the three‑dot menu, choose Manage Access, and deselect the practitioner.
Does insurance billing change when a client has multiple profiles?
No. Each profile maintains its own billing, documentation, and claims history.
Can I merge two client profiles later?
Not at this time. Once created, profiles remain separate to preserve documentation integrity.
Related Resources
For more information, see these resources: