
Insurance: Insurance Payers
Insurance payers are the insurance companies that provide coverage for your clients. To submit electronic claims, Sessions Health needs to know where to route them. You set this up by assigning a Payer ID to each payer in your account.
This guide covers adding new payers, finding correct Payer IDs, handling policies entered by clients, and optionally consolidating duplicate payers.
In this article
- Video Tutorial
- Adding a New Payer
- Managing Payers Added by Clients in the Portal
- Adding Payer IDs to Existing Payers
- Finding the Correct Payer ID
- Consolidating Duplicate Payers (Optional)
- Frequently Asked Questions
- Related Resources
Video Tutorial
Watch the video below for a step-by-step walkthrough of setting up and managing your insurance payers.
Adding a New Payer
You can add an insurance payer from Billing Settings or directly inside a client's chart.
From Billing Settings:
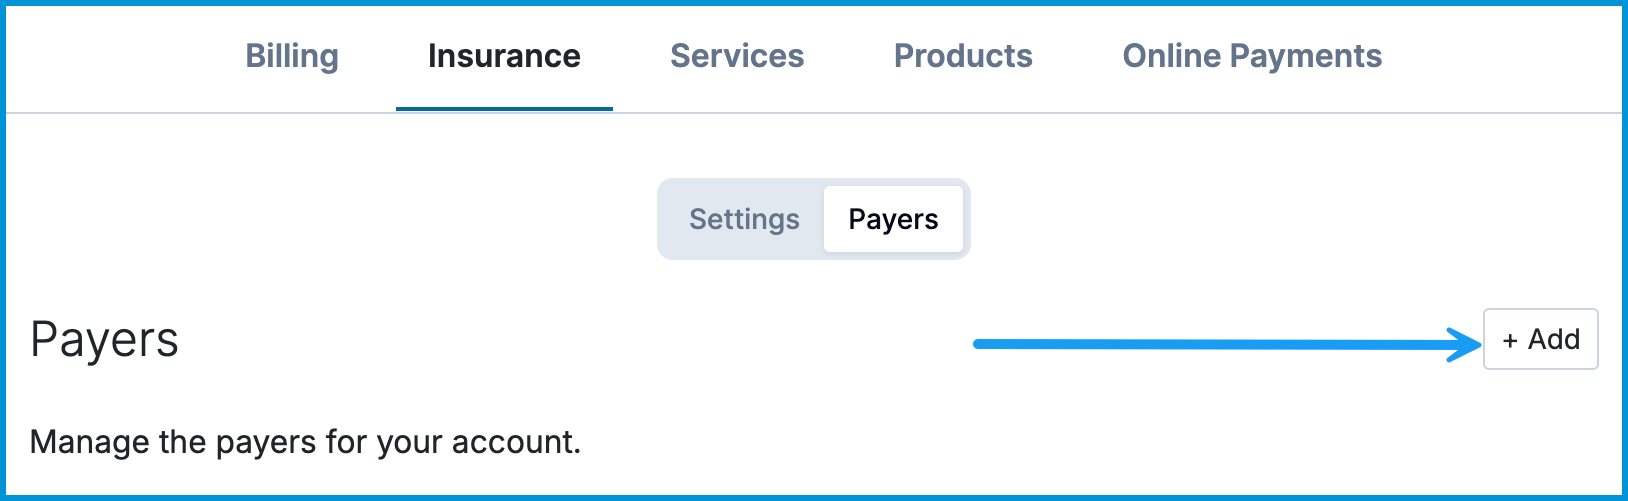
- Go to Billing Settings > Insurance > Payers.
- Click + Add.
- Enter the insurance company's name in the Name field.
- Click Payer ID to search for and select the correct Payer ID.
- Choose the Insurance Type from the dropdown menu.
- Fill out any optional details (address, phone number)
- Click Save.
From a Client Chart:
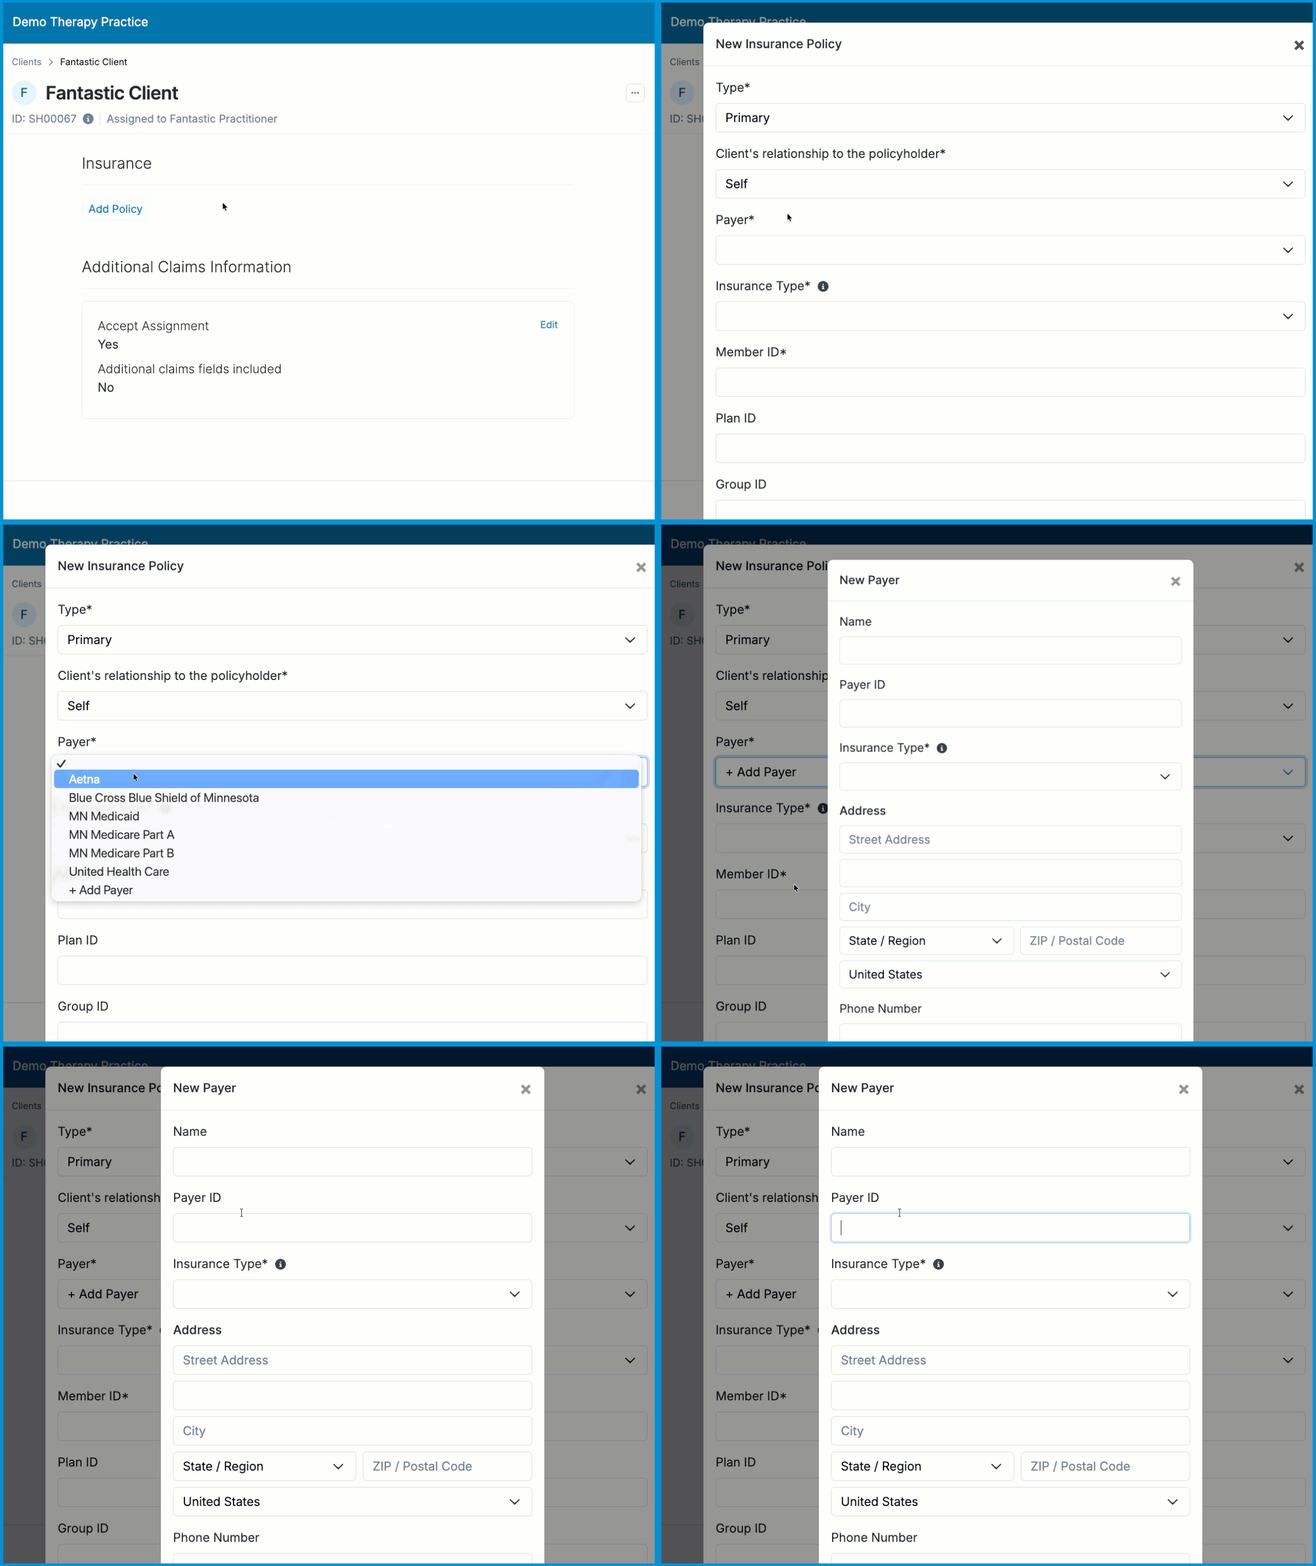
- Open the client chart and go to Billing > Settings.
- Scroll to Insurance and click Add Policy.
- Click the Payer dropdown and select + Add Payer at the bottom.
- Enter the Name, Payer ID, and Insurance Type.
- Click Save.
Managing Payers Added by Clients in the Portal
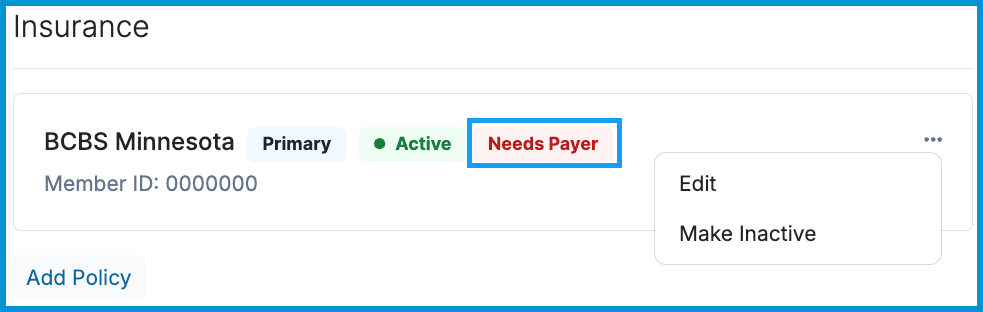
When clients enter insurance details through the Client Portal, the system will not automatically know the matching Payer ID. These entries display a red Needs Payer badge in the client's billing settings.
- Open the client chart and go to Billing > Settings.
- Scroll to Insurance to locate the red Needs Payer badge.
- Click Edit on the policy.
- Click the Payer dropdown.
- Select the matching payer from your account list (or click + Add Payer to create it).
- Click Save to assign the Payer ID and clear the warning badge.
Adding Payer IDs to Existing Payers
If your account contains imported payers missing a Payer ID, you must add the ID before submitting claims.
- Go to Billing Settings > Insurance > Payers.
- Locate any payer marked No Payer ID and click the pencil icon.
- Enter the Payer ID or insurance name in the Payer ID field.
- Select the correct option from the dropdown menu.
- Click Save.

ℹ️ Assigning a Payer ID to imported or duplicate entries will not interrupt pending electronic enrollments or force you to re-enroll. Enrollments sync to the clearinghouse using the Payer ID and your Tax ID/NPI, so Claim.MD recognizes them as the same connection.
💡 If a client import created duplicate payers (e.g., "BCBS MN" and "Blue Cross Blue Shield Minnesota"), simply assign the same Payer ID to both entries. You don't need to clean up duplicate rows to submit claims.
Finding the Correct Payer ID
Payer IDs vary by clearinghouse. Sessions Health uses Claim.MD as our clearinghouse, which provides a searchable Payer List.
- Go to the Claim.MD Payer Search website.
- Enter the Payer ID or insurance name in the search bar.
- Click View Payer to open details.
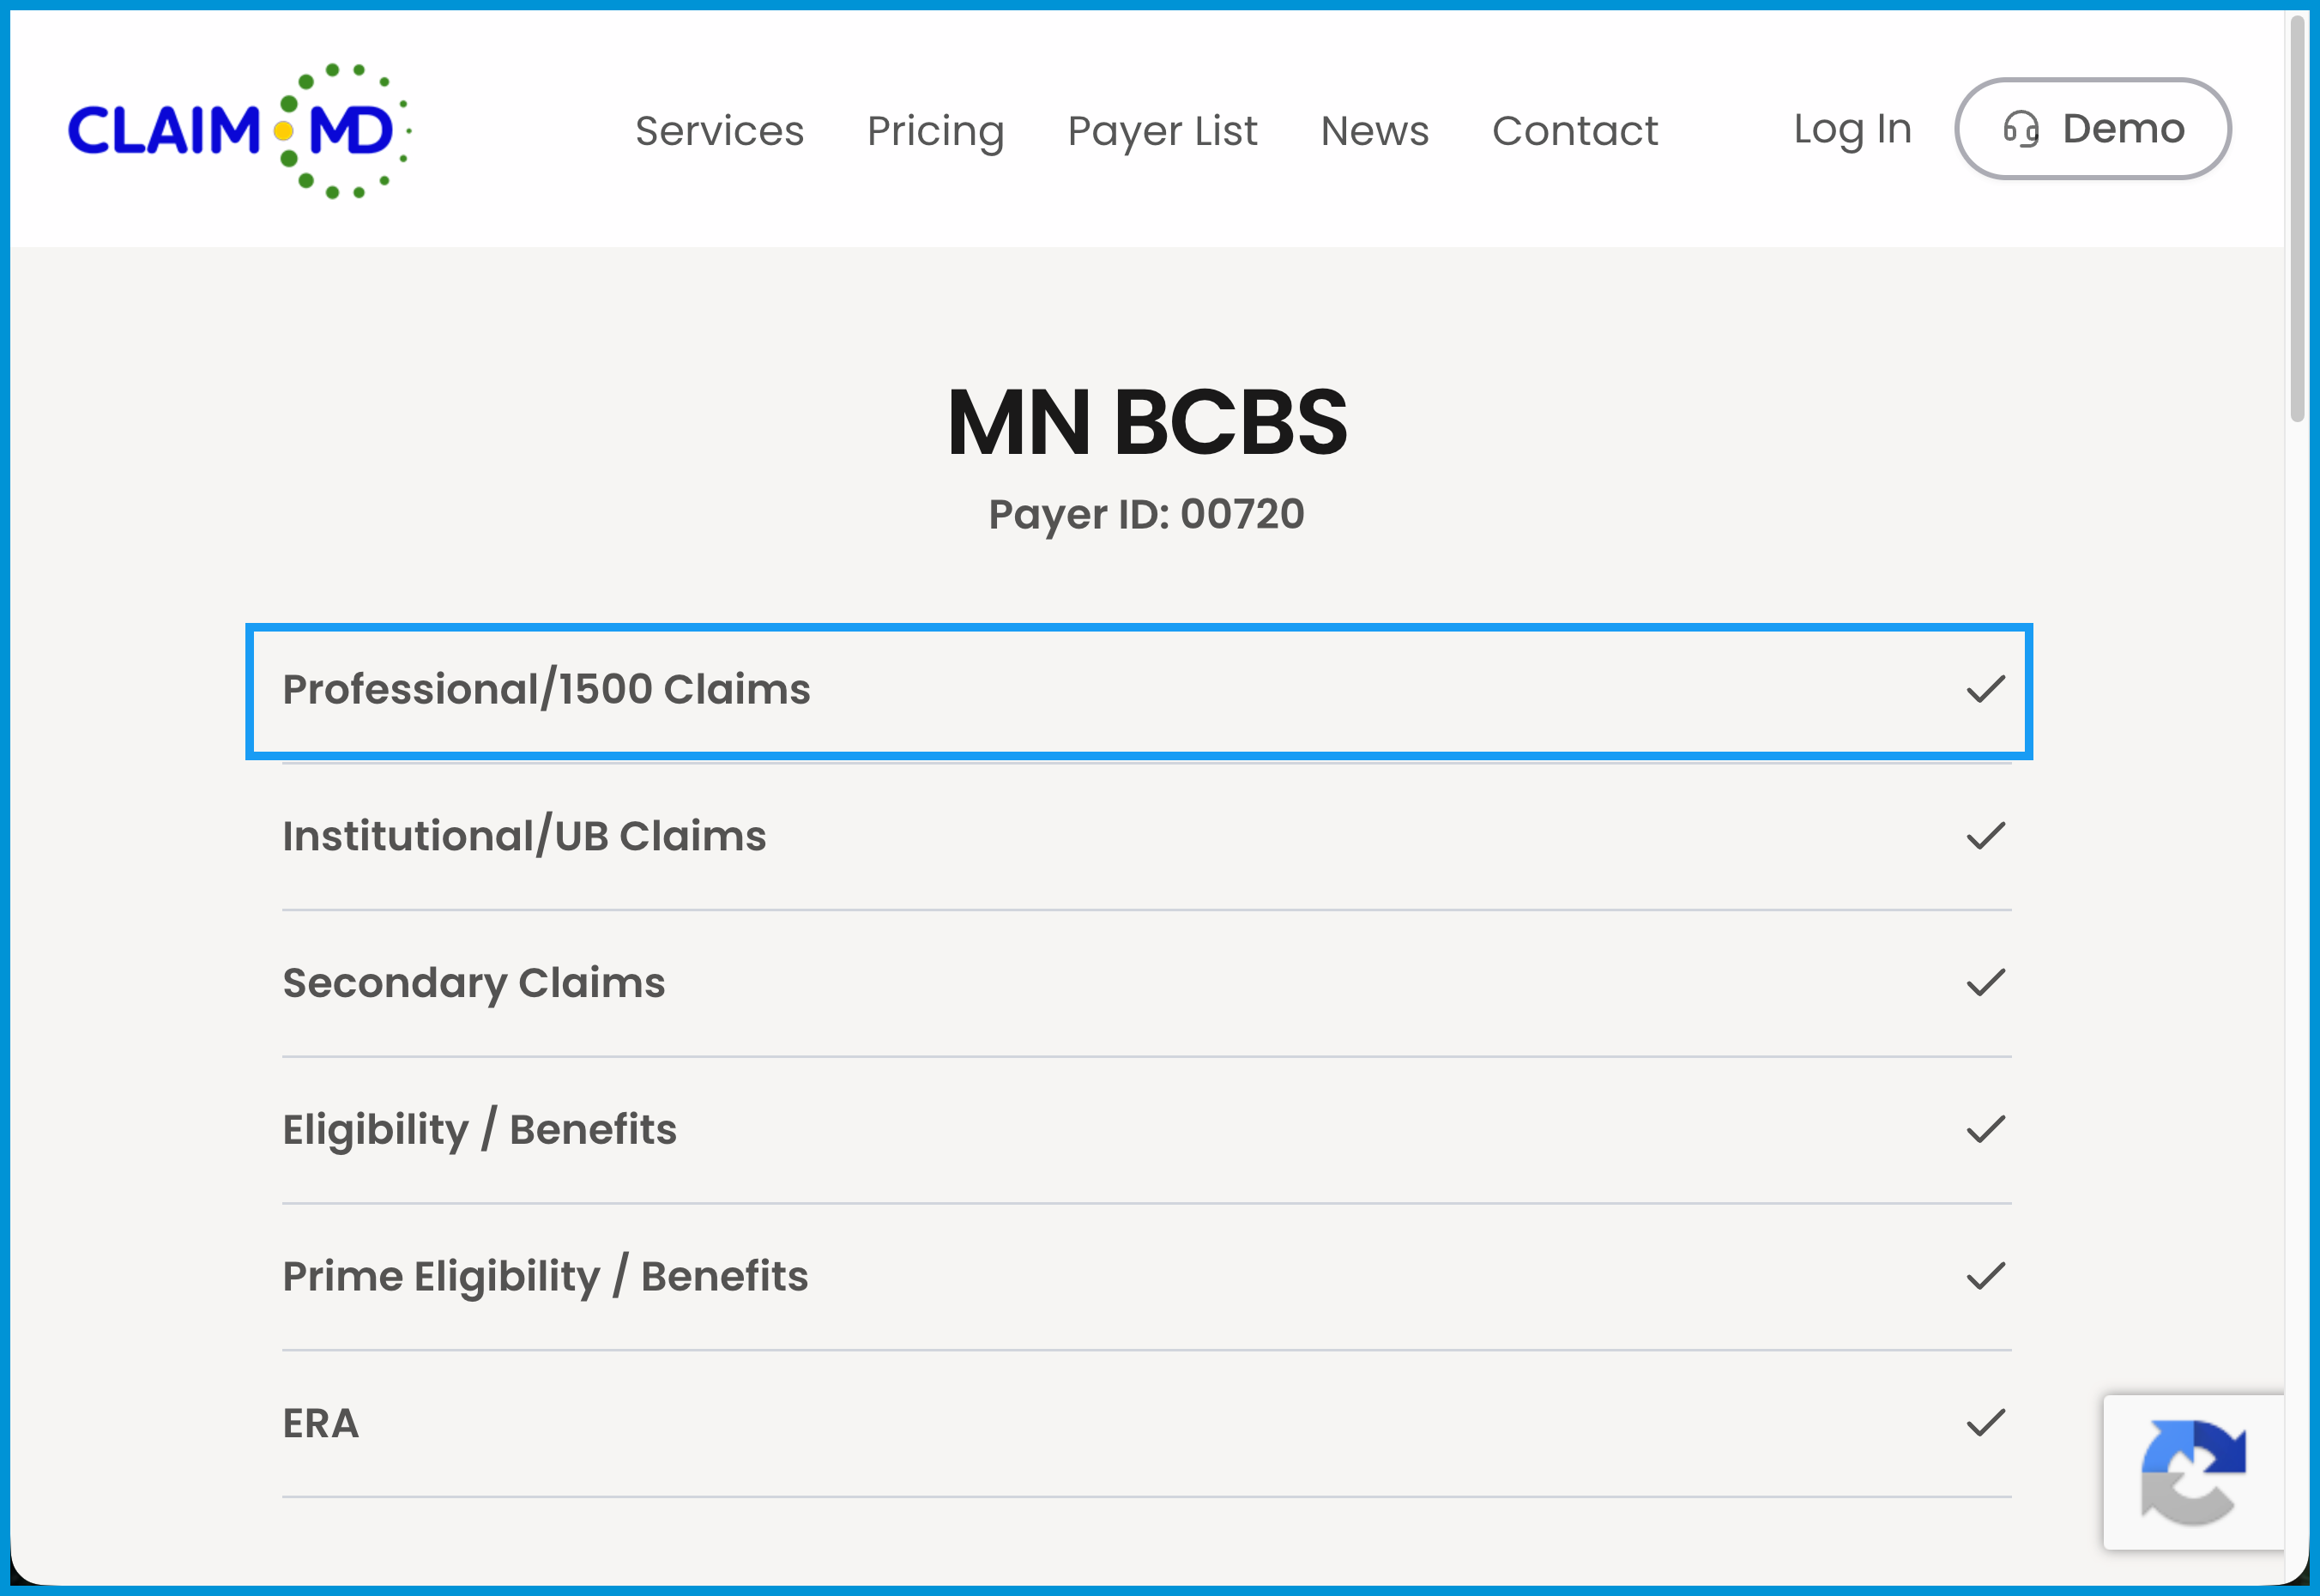
- Confirm that Professional/1500 Claims displays "Yes".
ℹ️ The Payer ID on a client's insurance card may differ from Claim.MD's ID. When searching Claim.MD, review the "also known as" list on the details page to confirm you have selected the correct matching entry.
Consolidating Duplicate Payers (Optional)
If you prefer a clean payer list, you can merge duplicate listings by reassigning clients to a main "keeper" payer.
💡 If you have dozens of clients assigned to a duplicate payer, editing each chart manually can take time. Remember that consolidating duplicate payers is completely optional! Assigning the same Payer ID to both duplicate entries lets your electronic claims process without changing individual client charts.
Step 1: Identify the Payer to Keep
- Go to Billing Settings > Insurance > Payers.
- Check the Policies column to identify which duplicate payer name has the most policies (your main "keeper" payer) and which entry has fewer.
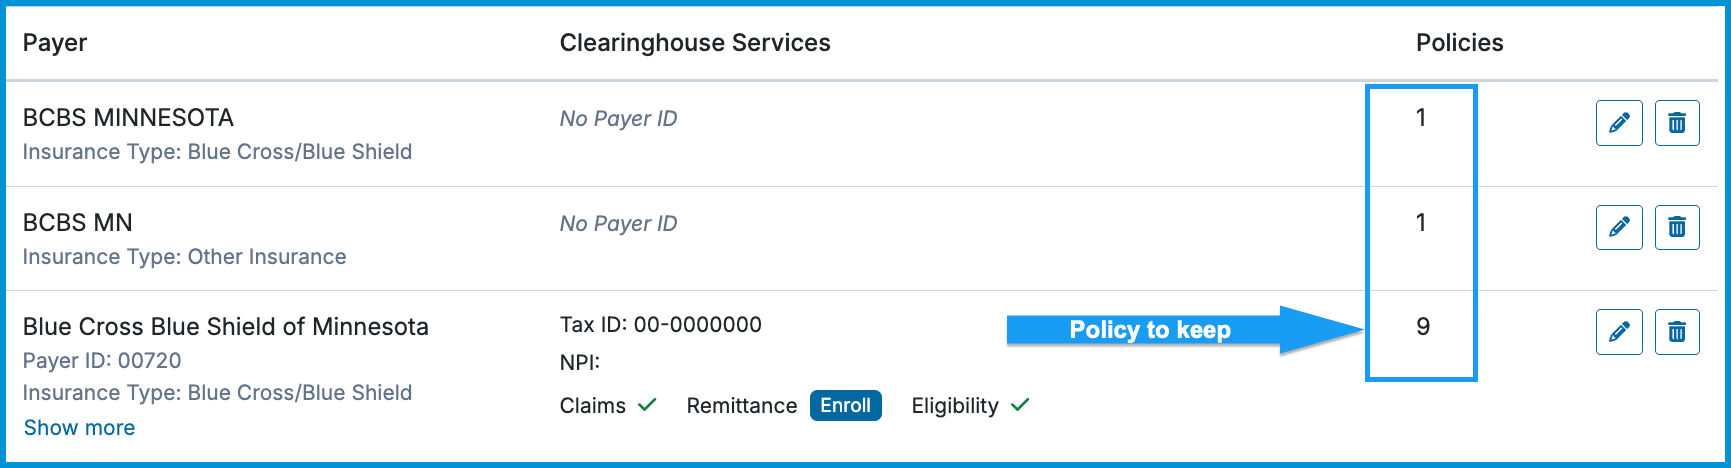
Step 2: Find Clients Needing Updates
- Go to Insights > Reports > Clients.
- Click Filter and set the Primary Payer or Secondary Payer filter to the duplicate payer you plan to remove.
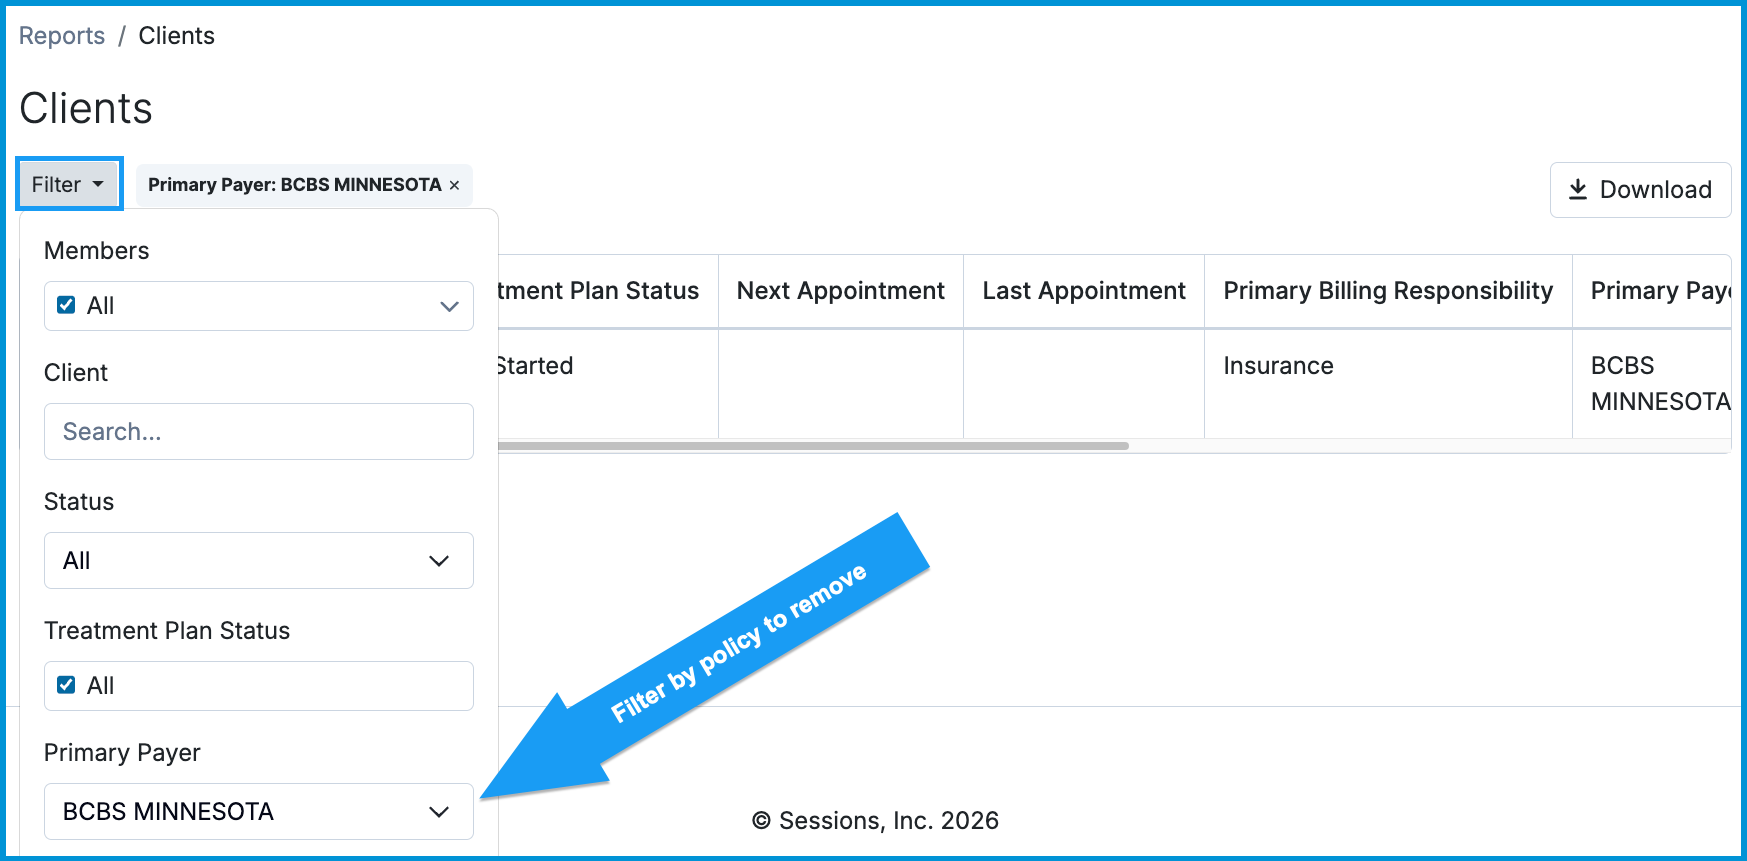
Step 3: Update Each Client's Payer
- Click a client's name from the report to open their chart.
- Go to Billing > Settings, scroll to Insurance, and click Edit.
- Update the Payer field to your main "keeper" payer and click Save.
- Repeat for all remaining clients listed under that duplicate payer.
See Insurance: Managing Client Insurance Policies for more information.
Step 4: Delete the Duplicate Payer
- Return to Billing Settings > Insurance > Payers. The duplicate entry will now show 0 policies.
- Click the trash icon next to the 0-policy payer to delete it.
Frequently Asked Questions
Do I have to clean up my duplicate payers?
No. Consolidating duplicates is entirely optional. Assigning the same Payer ID to duplicate entries allows claims to process without changing individual client charts.
Will consolidating duplicates affect my pending insurance enrollments?
No. Claims and remittance enrollments attach to your underlying Payer ID and Tax ID/NPI. Moving clients to a main payer row will not interrupt pending or approved enrollments.
How do I check if a specific payer is supported for electronic claims?
Search the Claim.MD Payer List for the payer name. If Professional/1500 Claims shows "Yes", you can submit claims through Sessions Health.
Why doesn't the Payer ID on my client's card match Claim.MD?
Clearinghouses often use internal Payer IDs. Cross-reference the ID from the client's card against the "also known as" list on Claim.MD's payer details page.
Related Resources
Use these additional guides to complete your insurance configuration: