Manage Client Information
This tutorial will help clinicians navigate the various features within their clients' charts.
Add additional files to your client record
Videos
We have a full list of client videos tutorials to demonstrate how to work with client records in Sessions Health.
Manage client information
You may edit client information by going to Clients > [Client Name] > Details. From this tab, you may manage:

- Account Information: Client email address, name, legal name, and pronouns
- Demographics: Manage birthday, birthday reminders, sex, and gender identity
- Client Contact Information: Phone number, address, and time zone
- Contact Preferences: Methods by which you may contact your client, i.e. phone, text, email.
- Appointment Reminder Settings: Customize appointment reminders for a client
Important: When adding a minor client, you may skip the email address field if they don’t have an email of their own. It’s best practice not to use the parent’s email address. Instead, add the parent(s) as a New Contact, or select Existing Contact to search for their name or email address and connect them if they’re already in the system.
Manage client status
If a client is no longer active and you'd rather not view them in your client list, you have two options:
- Make Inactive: This means that the client's information is still available (and are searchable), but they're hidden from your Clients list by default, and they're not available to be assigned to any new appointments.
- Permanently Remove: This option completely removes the client from your account, including all appointments, notes, attachments, and other documentation that have been collected.
To change a client's status, go to Clients > [Client Name] and click on the "..." in the upper right corner.

Adding a client contact
You can add a parent of a minor client, family member, or other contact to a client's chart. This can be particularly helpful when working with minors, adults who cannot manage their own healthcare, or situations when someone besides the client is handling payment for services.
From the client's Portal tab, click + to add a New or Existing Contact (if they are already in the system).

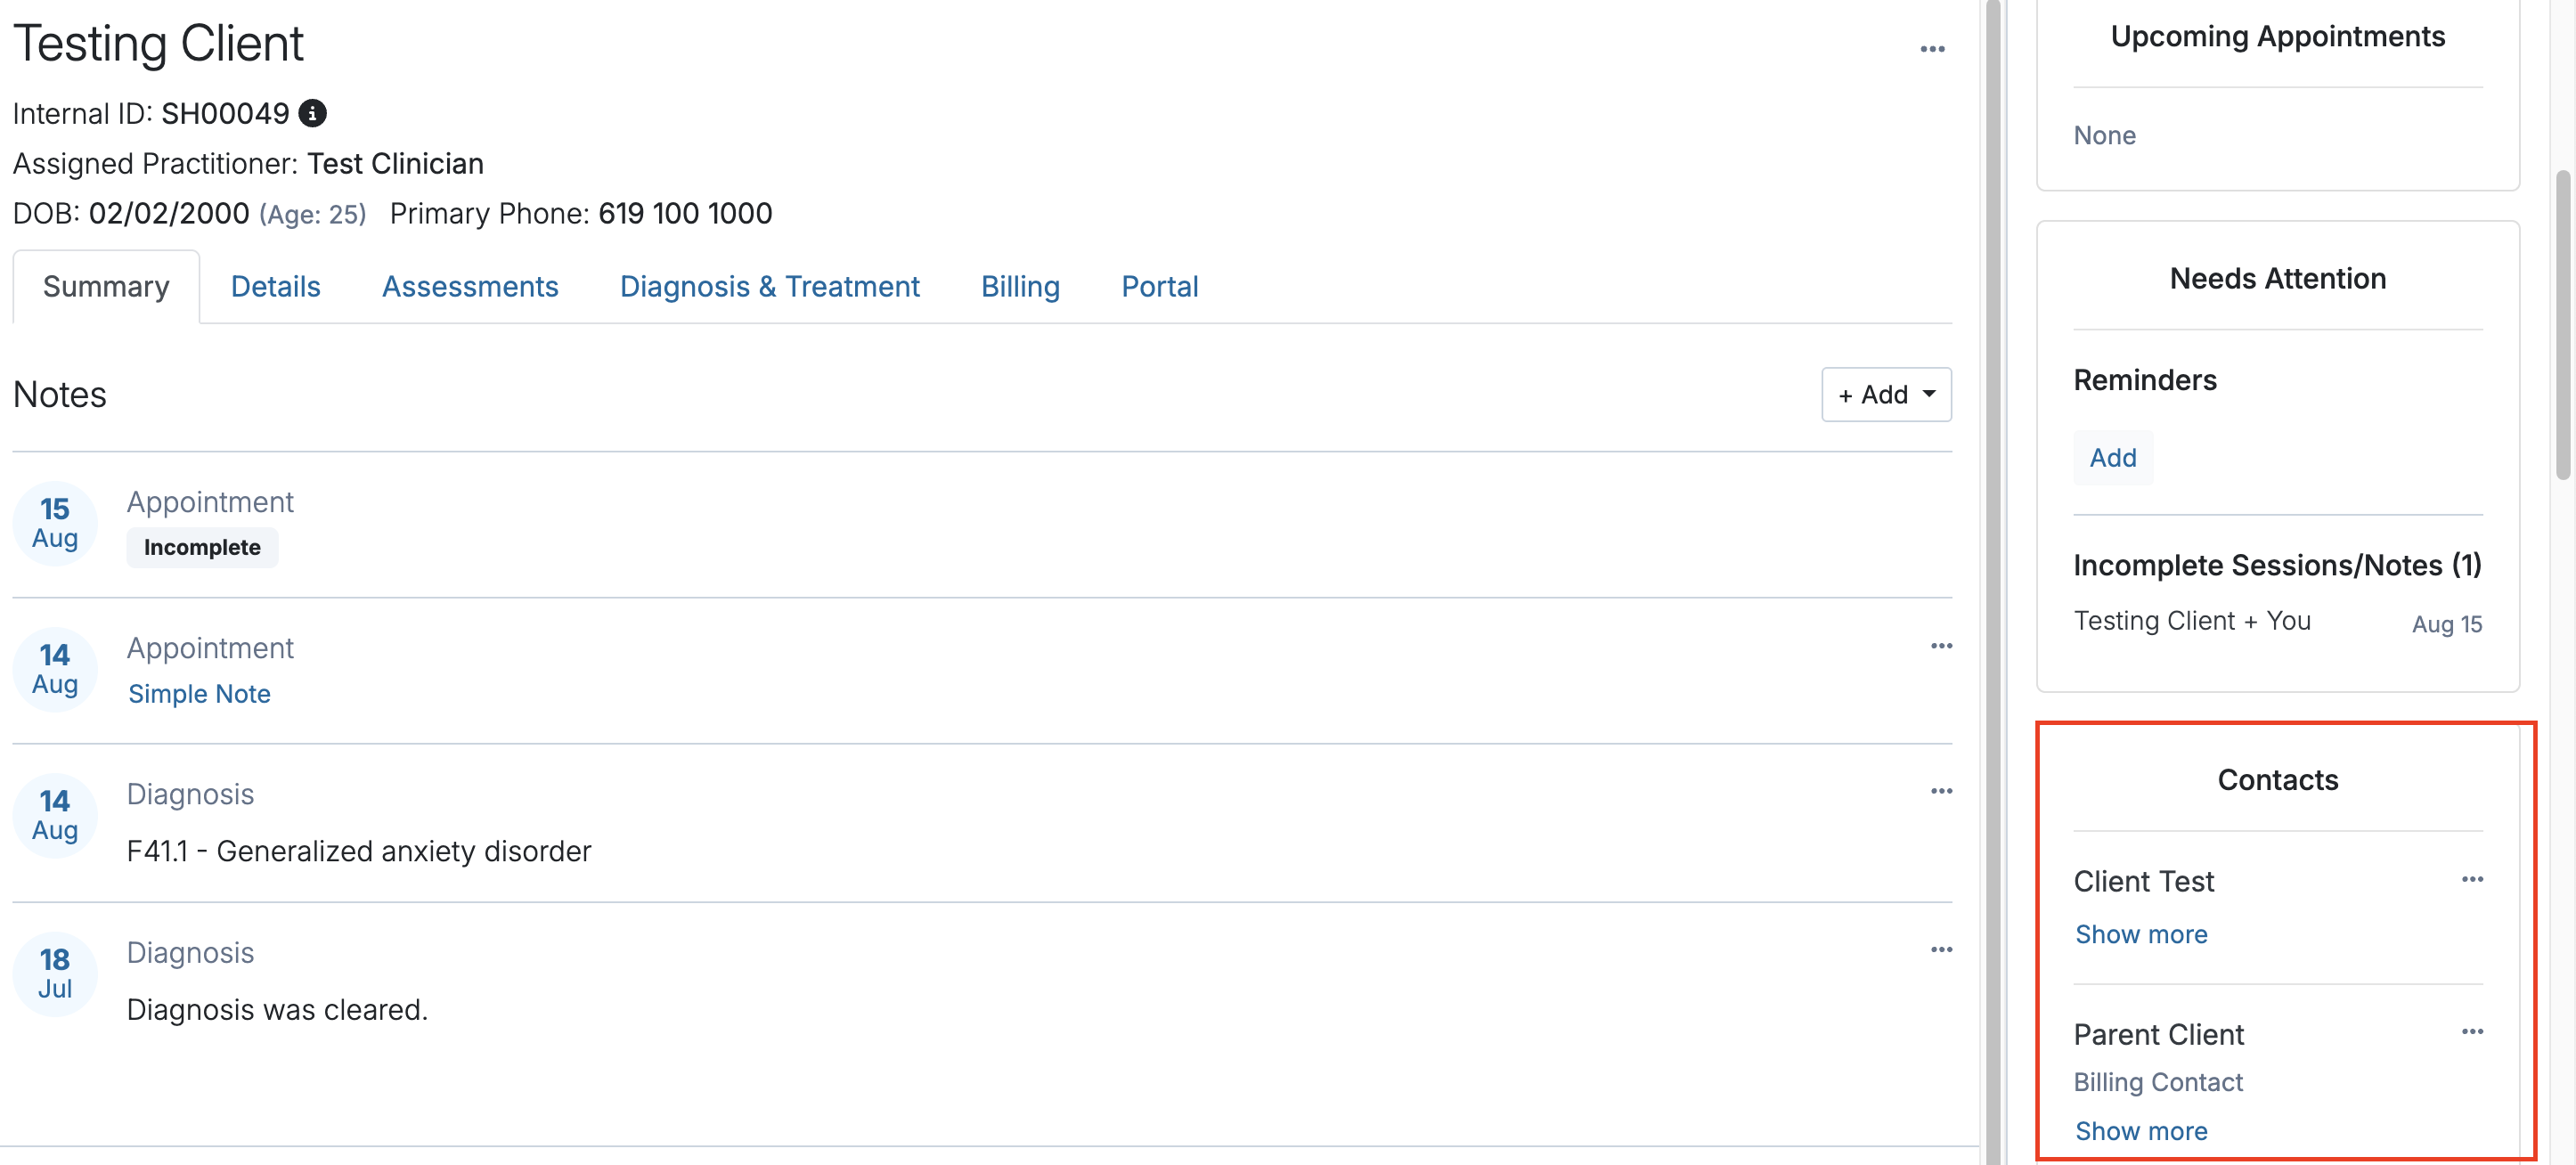
Alternatively, you may click the Add button in the Contacts section, found on the right-hand panel of the client's chart, a few sections below the Insight section.

In the pop-up, you can add a New Contact or Existing Contact.
New contact
Select New Contact and fill out their first and last name and email address.

Existing contact or client
You can use the Search field shown in the image below to locate and select an existing contact or client to serve as the contact for another client. If the contact or client has already been added to the system, select Existing Contact and search for their name.

You can designate each contact as an Emergency Contact and/or a Billing Contact. You may also grant a contact access to view and manage the client's information. While there is no limit to the number of contacts, you may only designate a single Billing Contact at a time to pay for services. You can also enable them to receive reminders for the client's appointments.
Once the contact has been added, go to the contact’s name subtab under the Portal tab. From there, you can choose whether the contact can view, manage, or complete information for the client by toggling the button to Yes.
Next, you may invite the contact to the portal, select which consent, intake or assessment forms you’d like to send them to complete on the client’s behalf, and then choose which permissions you’d like to grant to the contact.
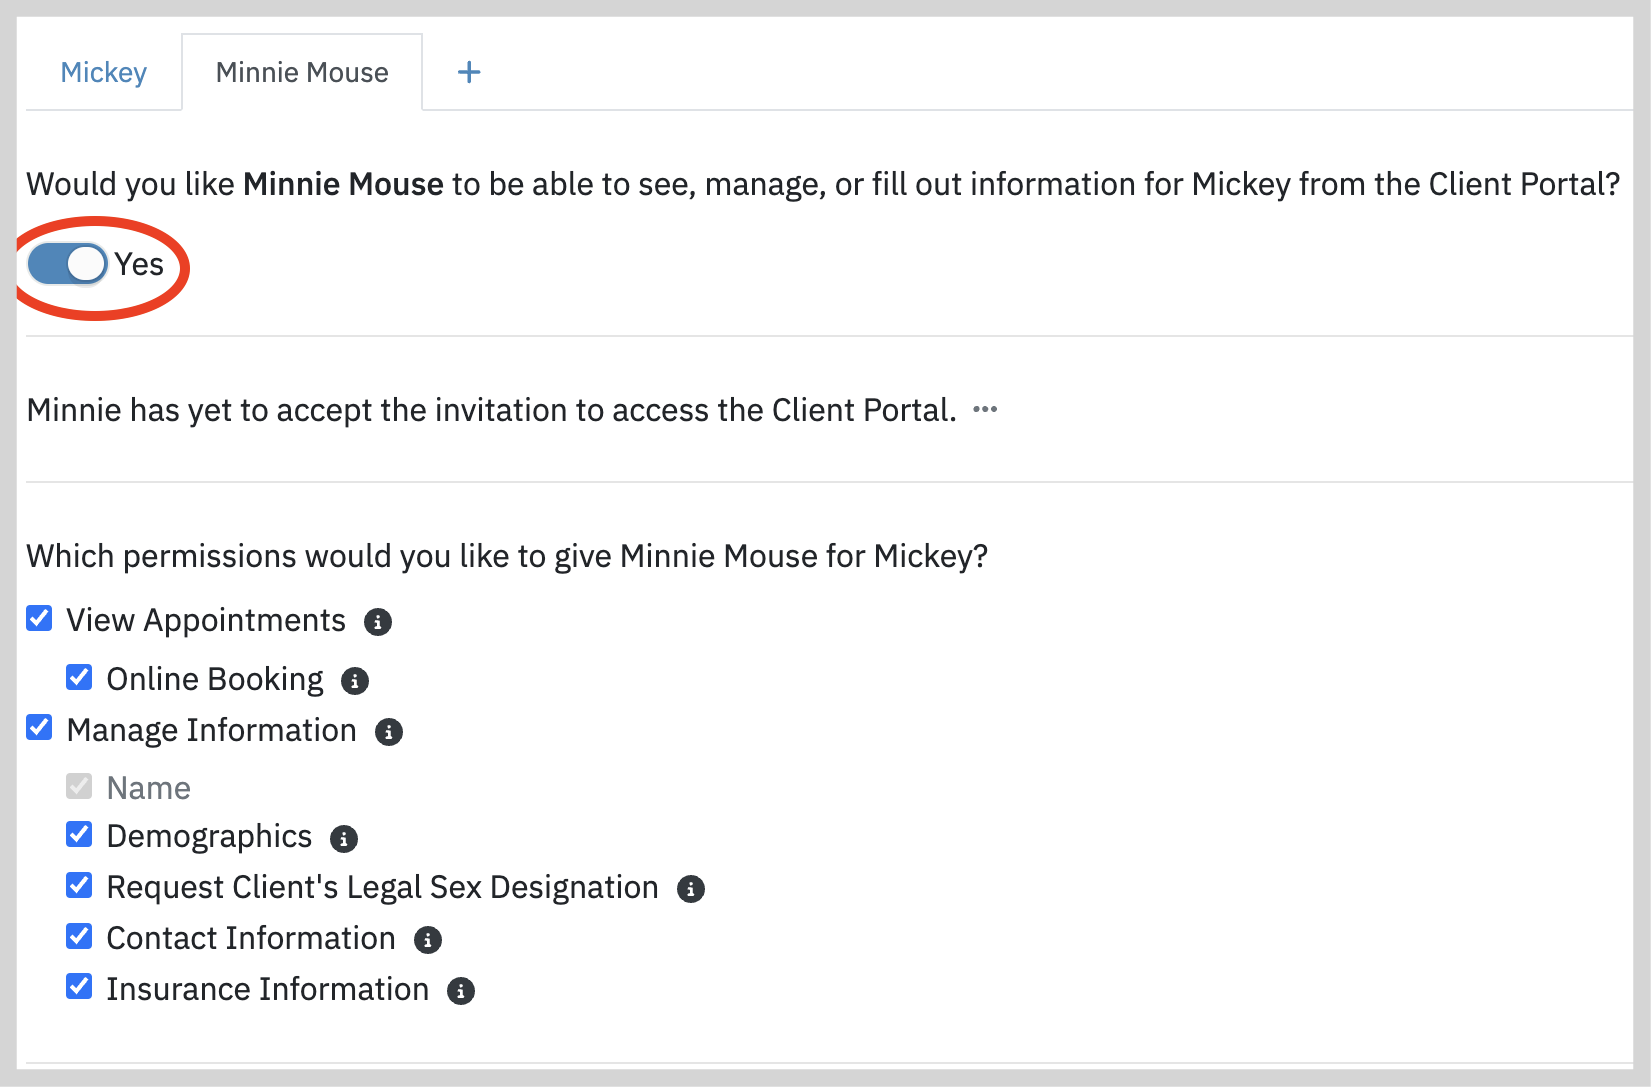
If an existing contact already has portal access, or after a new contact has accepted their portal invitation, you can still send forms for them to complete by scrolling down and clicking the Manage Documentation button. From there, you can choose which documents to send to the contact for completion.
Note: The Manage Documentation button will not be enabled until the contact has accepted the portal invitation.
Manage client contacts
If you need to change, add, or remove a contact after you have created your contact, you can do so by by going to the client's chart, and on the right-hand panel, scroll down to the Contacts section.
Click on the "..." next to the contact name and choose Edit or Remove.

When you click Edit, you can assign the contact as a billing contact and/or emergency contact, as well as enable them to receive appointment reminders or session-bridging questionnaires.
Contact's chart
To view and edit information in the contact’s chart, click on the contact’s name. The contact’s chart will display their client status and indicate who they are listed as a contact for: [Client Name].
In the Details tab, you can edit information such as their name, email address, including managing customized reminder settings. Their billing settings and portal information can be managed on their chart as well.
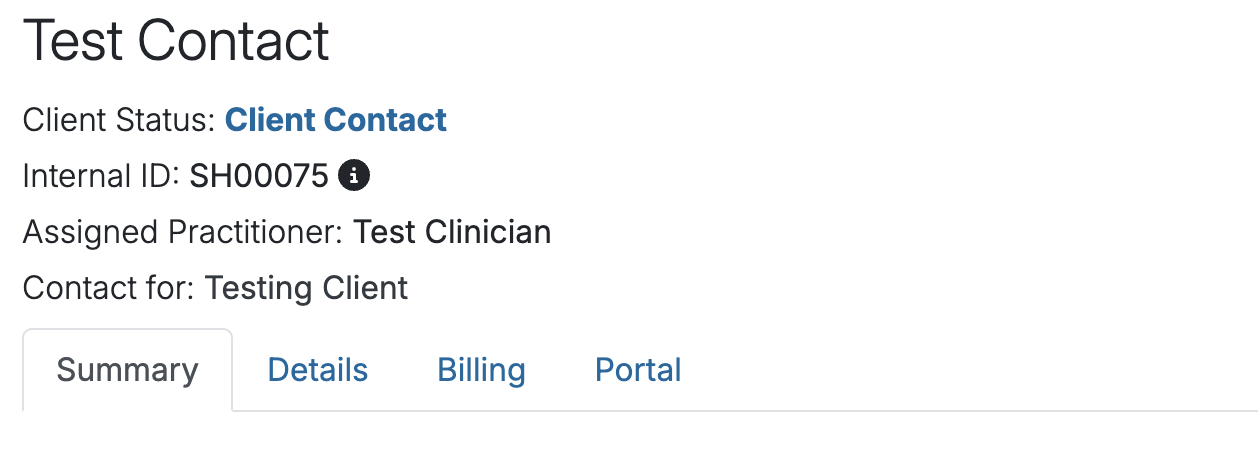
Note: Contacts imported from another EHR system and terminated / discharged clients are stored with a Client Status of Inactive.
Newly added contacts who have never been active clients in Sessions Health will display a Client Status of Client Contact.
Active clients who also serve as a contact will show a Client Status of Active.
All contacts will display Contact for: [Client Name] under the name header, and you may edit their contact details similarly.
If you activate the contact, they will become an active client and you will then see additional tabs such as Diagnosis and Treatment Plan. This can be helpful when a clinic is working with minors and their parents. The parents may be clients, but also be the emergency contact for their minor children. This allows parents to have a separate portal while also serving as billing contacts for both their own therapy services and those of their minor children.
Add additional files to your client record
Go to your client's record by going to Clients > View (Associated with Client's name). From the right-side navigation bar, scroll down until you see the Files section.
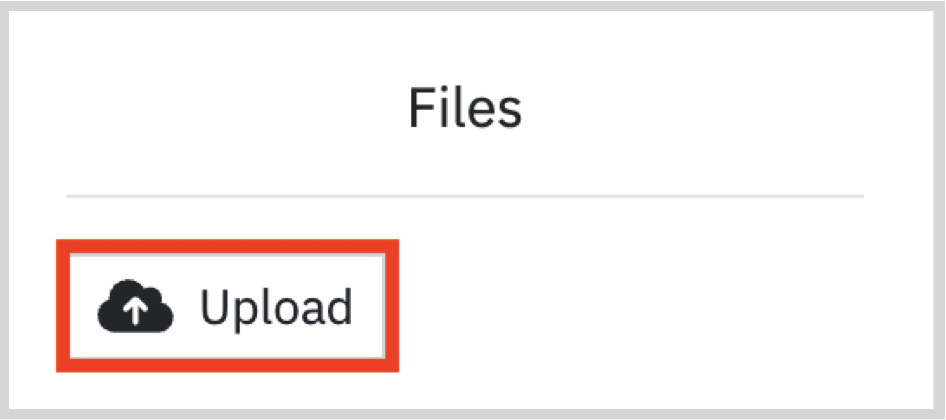
Click the Upload button and select the file(s) you'd like to upload to your client record. You can add the following files types (10MB max file size):
- Images (JPG,PNG,TIFF, etc.)
- Office Suite Documents (Microsoft Office, Apple Numbers, etc.)
- Audio and Video Files (MP3, MPEG, AVI, etc.)
- Plain Text Files
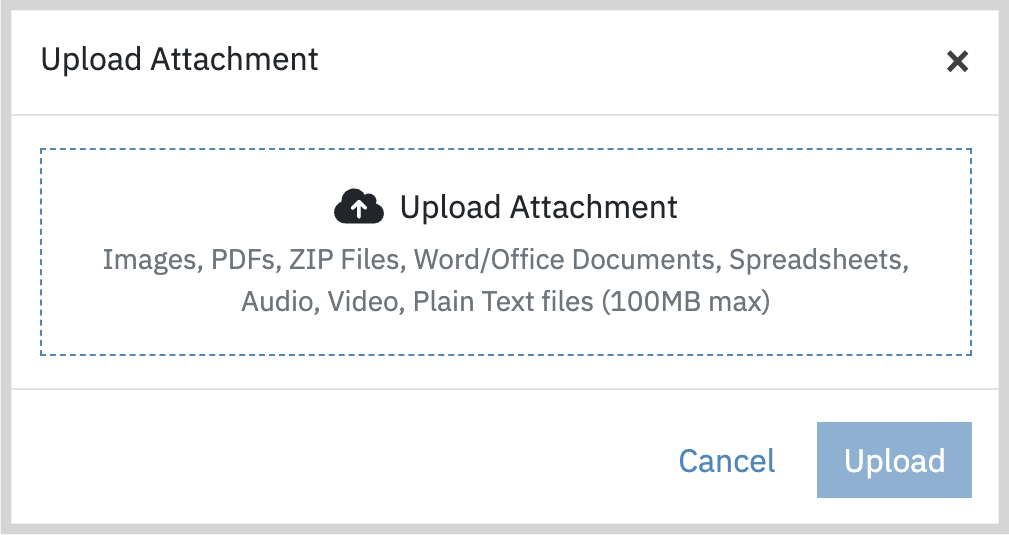
Note: Uploading documents in this section does not share the document with the client. To share a document, please review Share a Document Through the Client Portal.
If you would like to add files to a specific client session, see Creating a Session Note.
Client Events
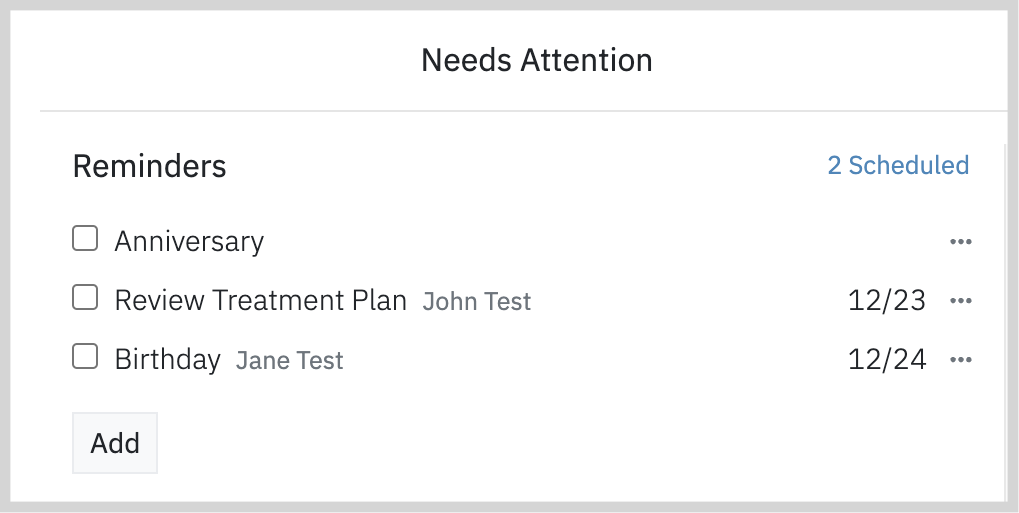
Sessions Health allows you setup reminders to keep track of important events. These are displayed in the Needs Attention section of your dashboard.
From the home screen, account level events may be viewed, added. and removed. The panel also indicates how many events are scheduled. Clicking on the link toggles the view so you can see all the events.
Add a new reminder
When you add a new reminder, you can select from several types. Getting reminded of a client birthday will automatically sync the birthday to the date on file for that client.
Client anniversary reminders are a great way to keep track of significant events in a client's life such as the death of a loved one so that you aware of how those important dates might be affecting a client.
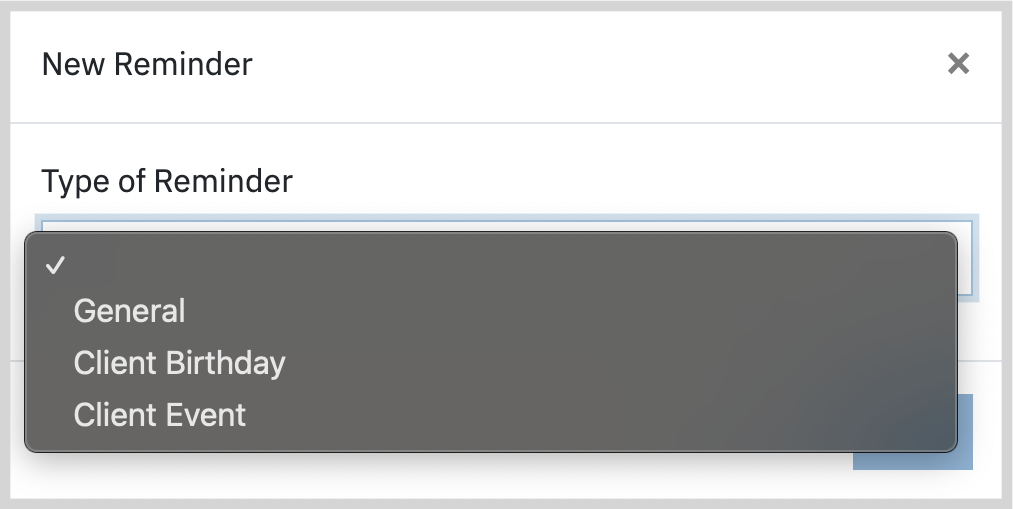
General Events
General events can be used to keep track of important dates for your your practice such as paying monthly or quarterly taxes and filing important paperwork like license renewals.
Client Reminders
Available on the right-hand sidebar on the Client record page is a Needs Attention section to keep track of client level reminders and create new ones.
Note: You may also create items as a reminder to take action. Just Click the "+ Add" button under "Reminders". Added reminders can be checked off when complete or removed from the list at any time via the '...' menu.
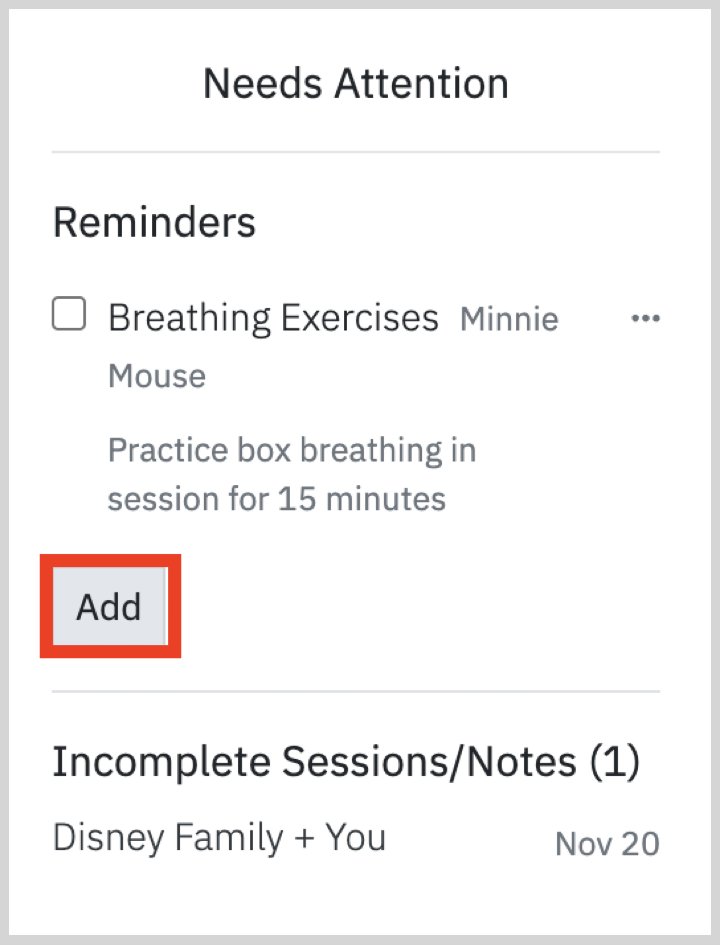
Important: Sessions Health will automatically add client- level reminders if the client intake is incomplete or an appointment has incomplete notes.
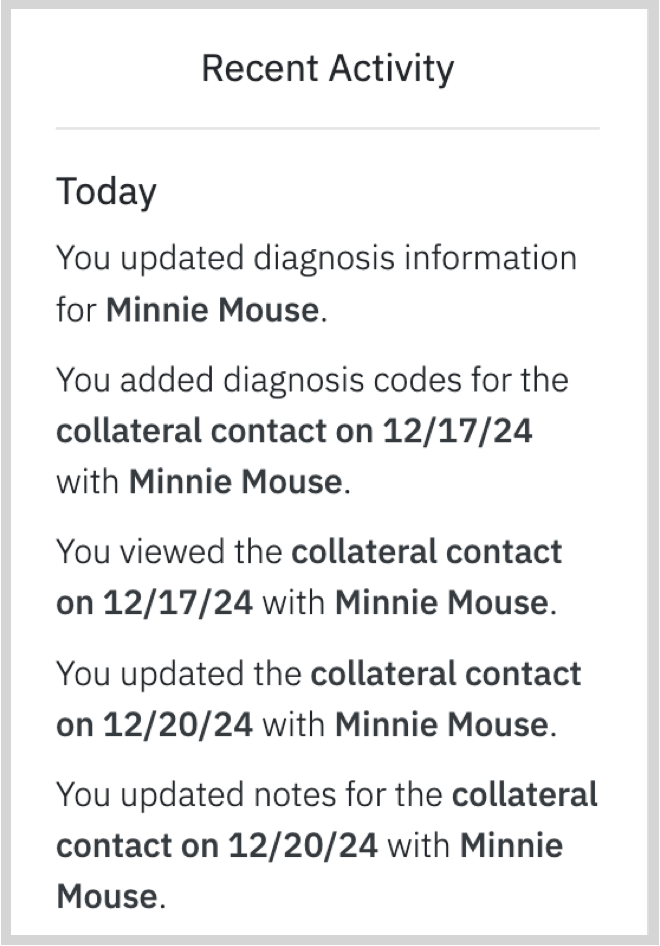
Client recent activity
To view all the activity that has taken place on a Client record, such as: views, edits, and creations, and which user performed the action, navigate to the "Recent Activity" panel to the right of the Client's record.
FAQ
How do you add the email for the parent contact to access the minor client's portal, if the email is taken?
1. On the minor client's chart, go to the Details tab.
2. Remove the parent's email from the primary email field and save your changes.
3. Go to the client's Portal tab, click the '+' sign to add the parent as a contact, then select Existing Contact.
4. Assign the parent roles as the Billing Contact or Emergency Contact if needed, and save the changes.
5. Ensure you toggle the permission to allow the parent to manage the minor's account and invite them to the portal.
For more information, please see our Managing Minor Client Records and Parent Access article.
How do make a contact into a client chart?
You can make the contact active by clicking on the "..." in the upper-right corner of the contact's chart, to Make Active. By clicking the "...", you can also reassign the practitioner if needed. While the contact is now a client chart, they will still show they are a contact for a client.
How do you reference clients in emails?
All clients referenced in emails to users will either (a) use the client’s internal ID if that setting is enabled, or (b) use the client’s initials. Initials are mostly safe from being considered PII unless someone is practicing in a very rural area. In that case, practitioners can use the internal ID setting to avoid leaking PII.
