
Client Contacts
Client contacts let you link family members, legal guardians, partners, or other individuals to a client's chart to assist with portal access, billing, or appointment reminders.
💡 Post-Import Tip: If you recently completed a bulk data import, your contacts are already in Sessions Health! They are stored as contact-only records under Clients with the filter set to Status: Inactive. You do not need to recreate them; simply link them using the steps below.
If a contact wasn't included in your imported data, you can add them as a New Contact at any time.
In this article:
- Video Tutorial
- Adding or Linking a Contact
- Updating or Removing Contacts
- Managing Portal Access & Permissions
- Managing Contact Profiles & Statuses
- Working with Minor Clients
- Frequently Asked Questions
- Related Resources
Video Tutorial
Watch this video tutorial to learn how to link existing or new contacts to a client's chart and set up their Client Portal access.
Adding or Linking a Contact
To add or link a contact, open the client's chart and choose one of two starting points:
- Select + on the Portal tab, or
- Select Add in the Contacts section on the right-hand panel.
In the Add Contact window, complete the following steps:
- Choose New Contact or Existing Contact:
- New Contact: Enter their First Name and Last Name; optionally add an Email and Phone Number.
- Existing Contact: Select the Existing Contact tab and search for someone already in your account (including imported contacts).
- Configure Contact Settings:
- Emergency Contact: Marks them as an emergency contact on the client's chart.
- Billing Contact: Directs all invoices, superbills, and payment requests to them (only 1 billing contact is allowed per client).
- Receive appointment reminders: Sends phone or email appointment reminders directly to them.
- Receive session bridging questionnaires: Sends session questionnaires to them.
- Relationship to Client: Select a role (e.g., Parent, Spouse / Partner, Legal Guardian, Family Member, Physician, Unspecified, or Other). Choosing Other opens a box to type a custom description.
- Additional Information: Add any internal notes about this contact.
- Select Save.

ℹ️ Each contact must have a unique email address to receive portal access and notifications.
Updating or Removing Contacts
To make changes to a contact on a client's chart:
- Locate the Contacts section in the right-hand panel of the client's chart.
- Select the three-dot menu next to the contact's name.
- Choose one of the following:
- Edit: Select Edit to update their permissions or relationship for this specific client.
- Remove: Select Remove to unlink them from this specific client's chart. Unlinking a contact does not delete their record from Sessions Health.

💡If you need to adjust the contact's name or contact information, you can do so from their personal profile. Select or search for their name, then edit their details.
Managing Portal Access & Permissions
If a contact needs to pay bills, fill out paperwork, or view appointment details for a client:
- On the client's Portal tab, select the contact's sub-tab.
- Toggle portal access to Yes.
- Select Invite to Portal and choose any initial consent, intake, or assessment forms you wish for them to fill out on behalf of the client.
- Select Send Invitation.
- Select portal permissions:
- View Appointments: Allows the contact to see the client's past and upcoming appointments in the Client Portal.
- Manage Information: Allows the contact to view and update client details (such as demographics or intake information) on the client's behalf.

✏️ You can send additional paperwork at any time by selecting Manage Documentation on the contact's portal sub-tab. For more information about portal invites, see Inviting Clients and Sharing Documents in the Client Portal.
Managing Contact Profiles & Statuses
Selecting a contact's name opens their profile. Updating their personal info on the Details tab changes their name, email, and phone number across every linked chart. Permissions like Billing Contact, Reminders, and Portal Access are managed separately within each individual client's chart.
Understanding Statuses
Their status tag indicates their account type:
-
Client Contact: Listed purely as a contact; receives no therapy services.

-
Active: Receives their own individual therapy services while serving as a contact.
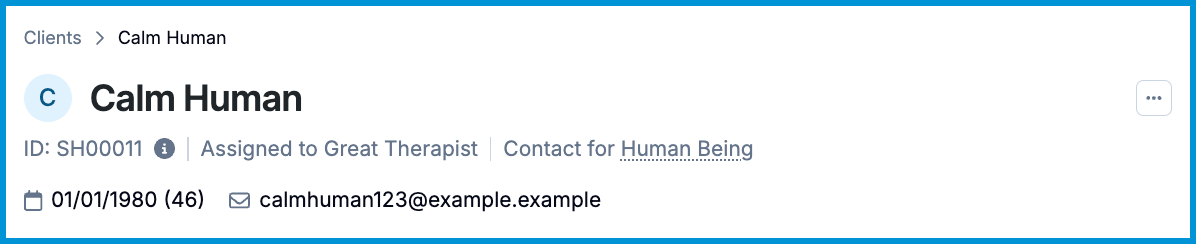
-
Inactive: An archived former client or imported record serving as a contact.

Activating a Contact for Individual Therapy
If a contact decides to begin receiving individual therapy services at your practice:
- Open the contact's chart.
- Select the three-dot menu in the top-right corner.
- Select Make Active.

ℹ️ Activating unlocks clinical tabs (like Diagnosis & Treatment) while keeping them linked as a contact for their family member.
Working with Minor Clients
When setting up a minor's chart, use contacts to grant parents or legal guardians the necessary permissions to manage care on the child's behalf.
Key setup guidelines for minors:
- Parent/Guardian Portal Access: Enable Manage Information on the parent's Portal sub-tab so they can complete intake forms, sign consent documents, and view records for the minor.
- Appointment Reminders: Select Receive appointment reminders on the parent's contact card to send text, email, or voice reminders directly to them.
- Multiple Parents or Guardians: Add each parent as an individual contact with their own unique email address. This allows both parents to have separate Client Portal logins and access.
- Billing Responsibility: Designate one parent as the Billing Contact on their contact card to handle payments, invoices, and superbills.
🧑🧑🧒 For more workflows, see Managing Minor Client Records and Parent Access in Sessions.
Frequently Asked Questions
Do contacts need to be marked as "Active"?
No. Contacts who are strictly parents, legal guardians, or emergency contacts should remain Inactive.
Can a contact share an email address with the primary client?
No. Every contact must have a unique email address to ensure secure Client Portal access and separate notification delivery.
Can one contact be linked to multiple family members (e.g., siblings)?
Yes. When adding a contact to a second client's chart, choose the Existing Contact tab in the Add Contact window to link their existing profile without creating a duplicate record.
How do I change who is responsible for billing?
Edit the contact card of the person who should receive invoices and check Billing Contact. Since only one billing contact can be designated per client, checking this on a new contact will automatically update the role.
Related Resources
For more information about client setup and contacts, see our other articles: